Table of Contents
Ever wondered how a simple twist of hair can transform your entire look? The beauty of a single, elegant strand – that's the magic of one hair braid. From the playground to the runway, this timeless hairstyle has proven its versatility and enduring appeal. Whether you're aiming for a casual, bohemian vibe or a sophisticated, polished finish, mastering the art of the single braid opens up a world of possibilities. But where do you begin? What are the secrets to achieving that perfect, effortless braid? In this guide, we'll unravel the mysteries behind creating stunning single braids, starting with the basics and moving onto more intricate styles. We'll explore various braiding techniques, offer tips on maintaining healthy, luscious locks, and provide inspiration for taking your single braid game to the next level. So, grab your comb, a few elastics, and get ready to embark on a journey of hair-braiding discovery. Let's dive in and learn how to create a single braid that turns heads and expresses your unique style!
The Allure of One Hair Braid: Styles and Inspiration
The Allure of One Hair Braid: Styles and Inspiration
The single braid – it's more than just a hairstyle; it's a statement. Think about it: from ancient civilizations to modern-day fashion icons, the single braid has been a symbol of beauty, strength, and cultural identity. What makes it so captivating? Maybe it's the simplicity, the way a few strands of hair can be woven into something so elegant and intricate. Or perhaps it's the versatility – a single braid can be dressed up or down, worn to a formal event or a casual day out. Whatever the reason, there's no denying the allure of the single braid.
StepbyStep Guide to Creating a Perfect Single Braid
StepbyStep Guide to Creating a Perfect Single Braid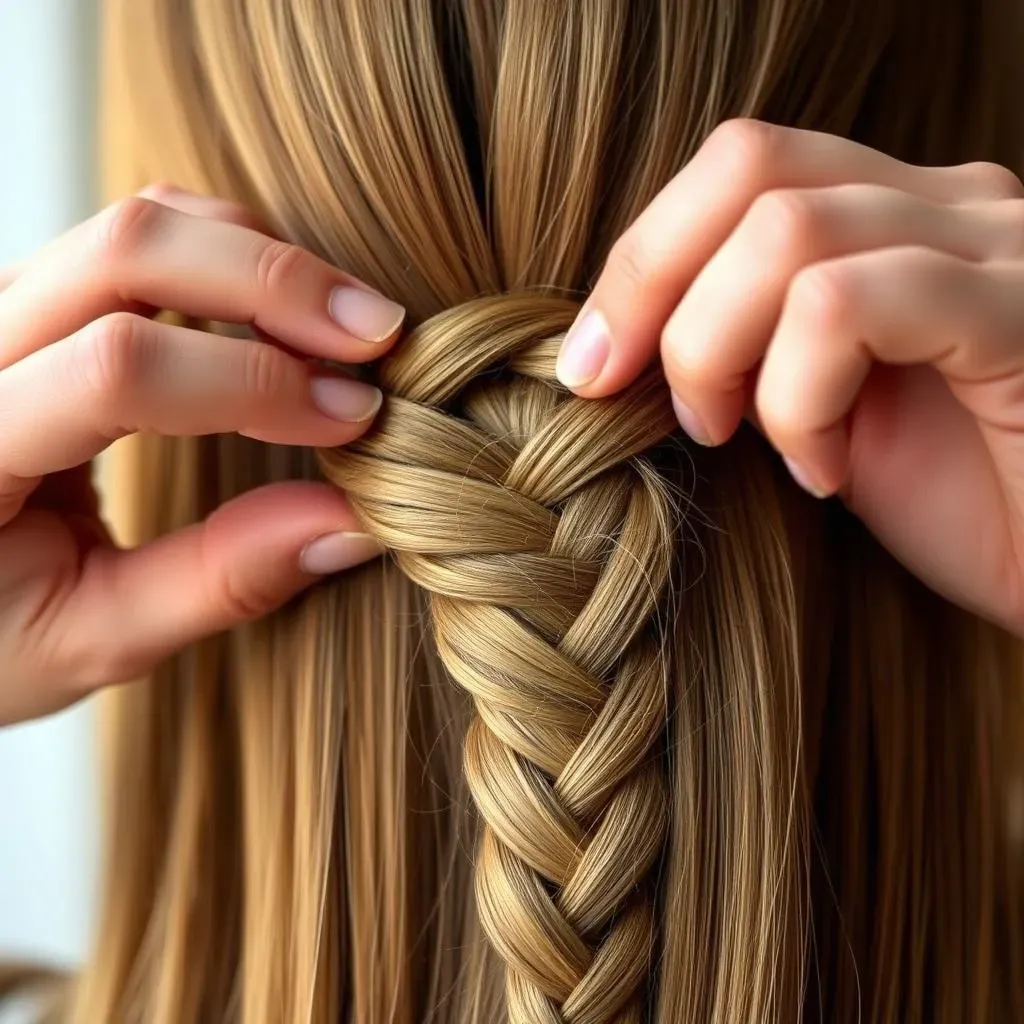
#1: Gathering Your Supplies and Preparing Your Hair
Alright, so you're ready to dive into the world of single braids? Awesome! First things first, let's gather our supplies. You'll need a brush or comb to detangle your hair, a hair tie or elastic band to secure the end of the braid, and maybe a little bit of hairspray or styling product to keep everything in place. It's like prepping your canvas before painting – the better the preparation, the better the final result. Start by thoroughly brushing your hair to remove any knots or tangles. This will make the braiding process so much smoother and prevent those annoying snags along the way. Trust me, your fingers will thank you!
Now that your hair is detangled, consider adding a bit of texture or grip. Freshly washed hair can sometimes be too slippery to braid easily, so a texturizing spray or even a light mist of dry shampoo can work wonders. If your hair is naturally fine or silky, this step is especially important. Distribute the product evenly throughout your hair and then give it another quick brush to ensure it's all nicely incorporated. With your hair prepped and ready to go, you're one step closer to achieving that perfect single braid!
"The best braid is the one you feel confident wearing." - Unknown
#2: Mastering the Basic Three-Strand Braid
now for the main event: the basic three-strand braid. This is the foundation upon which all other braids are built, so it's essential to get this down. Start by dividing your hair into three equal sections. Imagine you're holding three ropes, ready to weave them together. Now, bring the right section over the middle section, so it becomes the new middle section. Then, bring the left section over the new middle section. That's it! That's the basic motion you'll repeat all the way down.
Continue braiding, always bringing the outside sections over the middle section, until you reach the end of your hair. Keep the tension consistent throughout the braid to ensure it looks even and neat. Once you've reached the end, secure the braid with a hair tie. And there you have it – a classic, beautiful three-strand braid! Don't worry if it's not perfect on your first try. Like any skill, braiding takes practice. The more you do it, the more comfortable and confident you'll become. So, grab your hair and start practicing!
Step | Action | Tip |
|---|---|---|
1 | Divide hair into three sections | Ensure sections are equal for even braid |
2 | Bring right section over middle | Keep tension consistent |
3 | Bring left section over middle | Repeat steps down to the end |
4 | Secure with hair tie | Choose a hair tie that matches your hair color |
Creative Variations: Elevating Your One Braid Hairstyle
Creative Variations: Elevating Your One Braid Hairstyle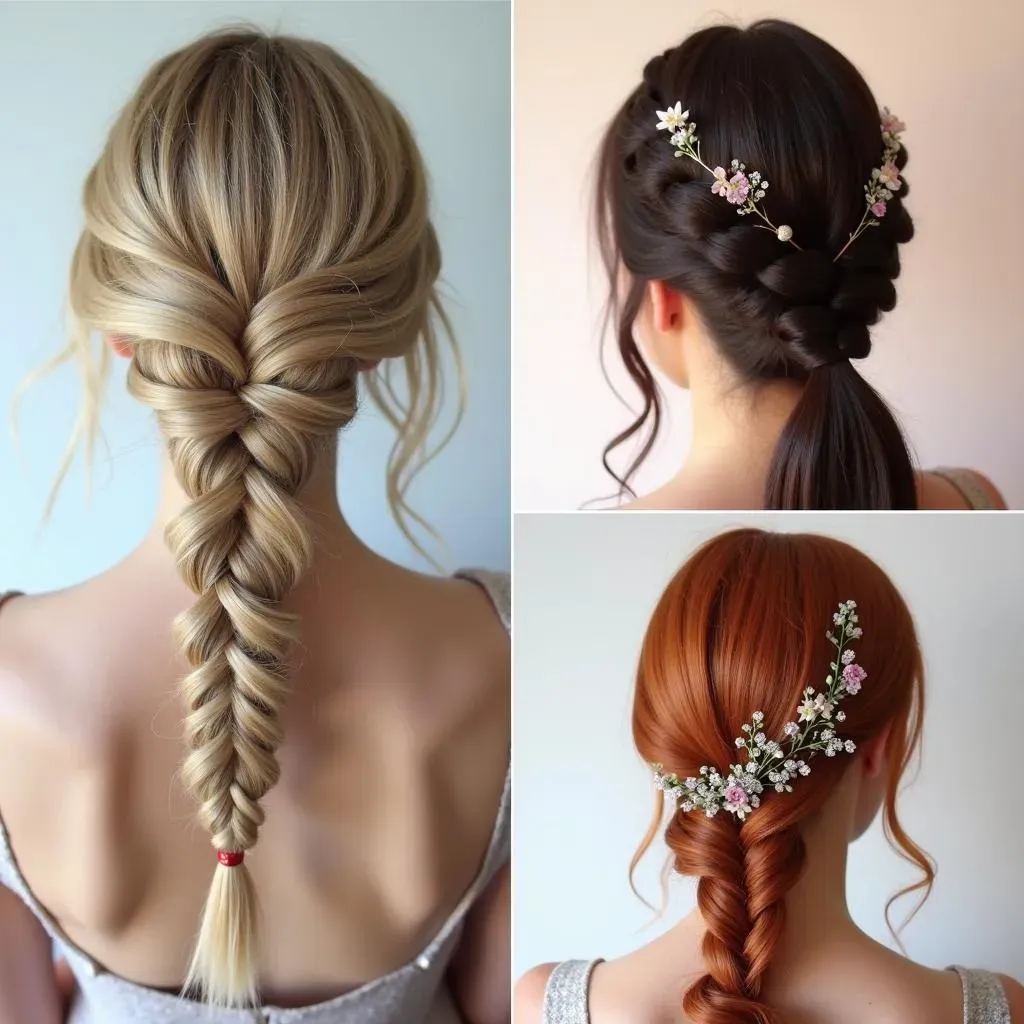
#1: The Fishtail Braid: A Touch of Texture
Ready to kick your single braid up a notch? Let's talk about the fishtail braid. It looks intricate, but trust me, it's easier than it seems. Instead of three sections, you'll work with two. Take a small strand from the outside of one section and cross it over to the inside of the other section. Repeat on the opposite side, and continue alternating until you reach the end. The result? A beautifully textured braid that's perfect for adding a touch of bohemian flair to any outfit.
One of the great things about the fishtail braid is that it can be customized to suit your style. For a more relaxed look, gently pull apart the braid to create a looser, more voluminous effect. Or, for a sleeker, more polished finish, keep the strands tight and close together. Experiment with different textures and finishes until you find a style that you love. And don't be afraid to add accessories, like beads or ribbons, to really make it your own.
"Life is too short to have boring hair."
#2: The Dutch Braid: Adding Dimension
Next up, let's explore the Dutch braid. Also known as an inverted French braid, the Dutch braid creates a raised effect that sits on top of your hair, adding dimension and visual interest. The technique is similar to a French braid, but instead of crossing the sections over each other, you cross them underneath. This simple change creates a braid that pops, making it a perfect choice for those who want to make a statement.
The Dutch braid is incredibly versatile and can be incorporated into a variety of hairstyles. Try braiding it along your hairline for a cool, edgy look, or create two Dutch braids on either side of your head for a playful, youthful vibe. You can even combine it with other braiding techniques, like the fishtail or the classic three-strand braid, to create a truly unique and eye-catching style. Don't be afraid to experiment and see what works best for you!
Braid Type | Technique | Style |
|---|---|---|
Fishtail | Two-strand crossing | Bohemian, Textured |
Dutch | Inverted French braid | Dimensional, Edgy |
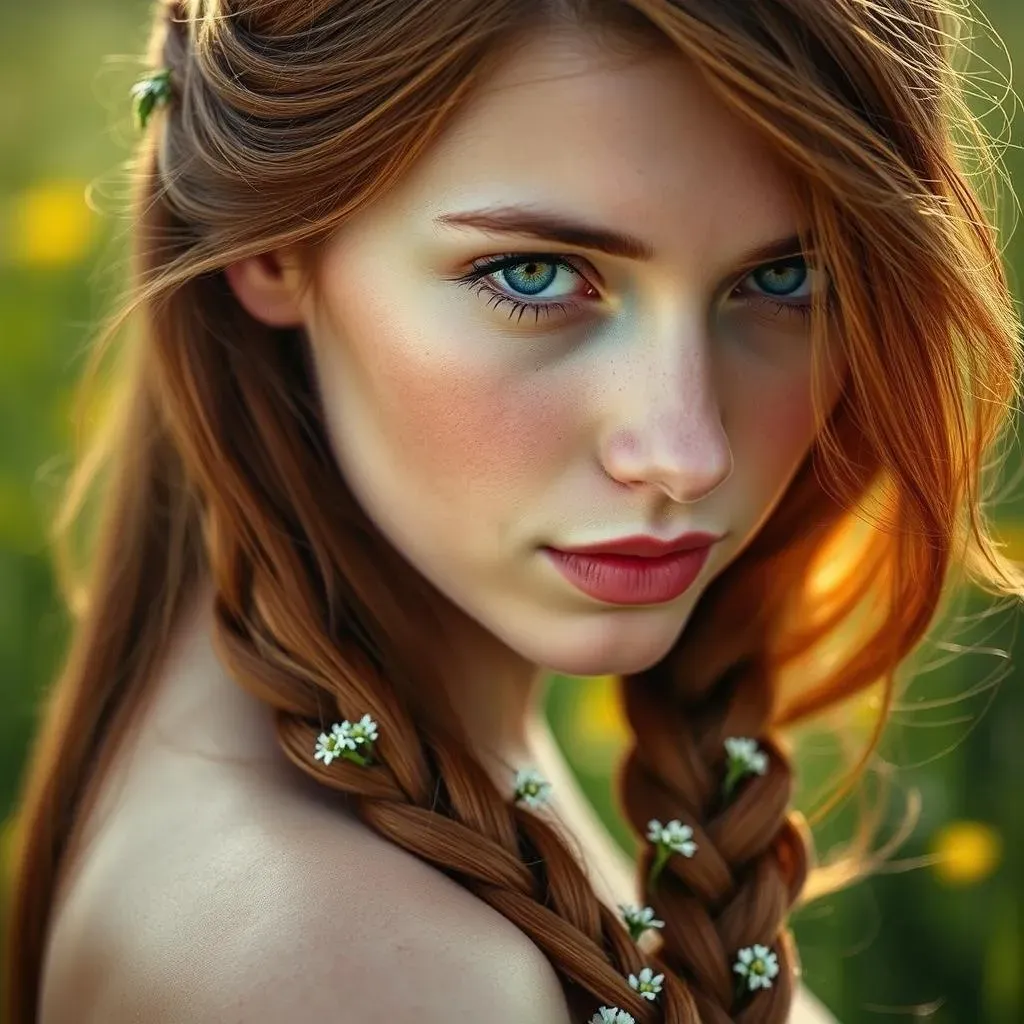
#3: Accessorizing Your Braid: Adding Personal Touches
Now, let's talk about accessories! Adding a few well-chosen accessories can take your single braid from simple to stunning. Think about incorporating delicate hairpins, sparkling clips, or even fresh flowers. A few strategically placed accessories can instantly elevate your look and add a touch of personality. Consider the occasion and your personal style when choosing your accessories.
For a more casual, bohemian vibe, try adding some colorful beads or feathers to your braid. Or, for a formal event, opt for elegant pearls or crystals. The possibilities are endless! Don't be afraid to mix and match different accessories until you find a combination that you love. And remember, less is often more. A few carefully chosen accessories can have a much bigger impact than a whole bunch of random ones. Have fun and let your creativity shine!
Maintaining and Protecting Your Single Hair Braid
Maintaining and Protecting Your Single Hair Braid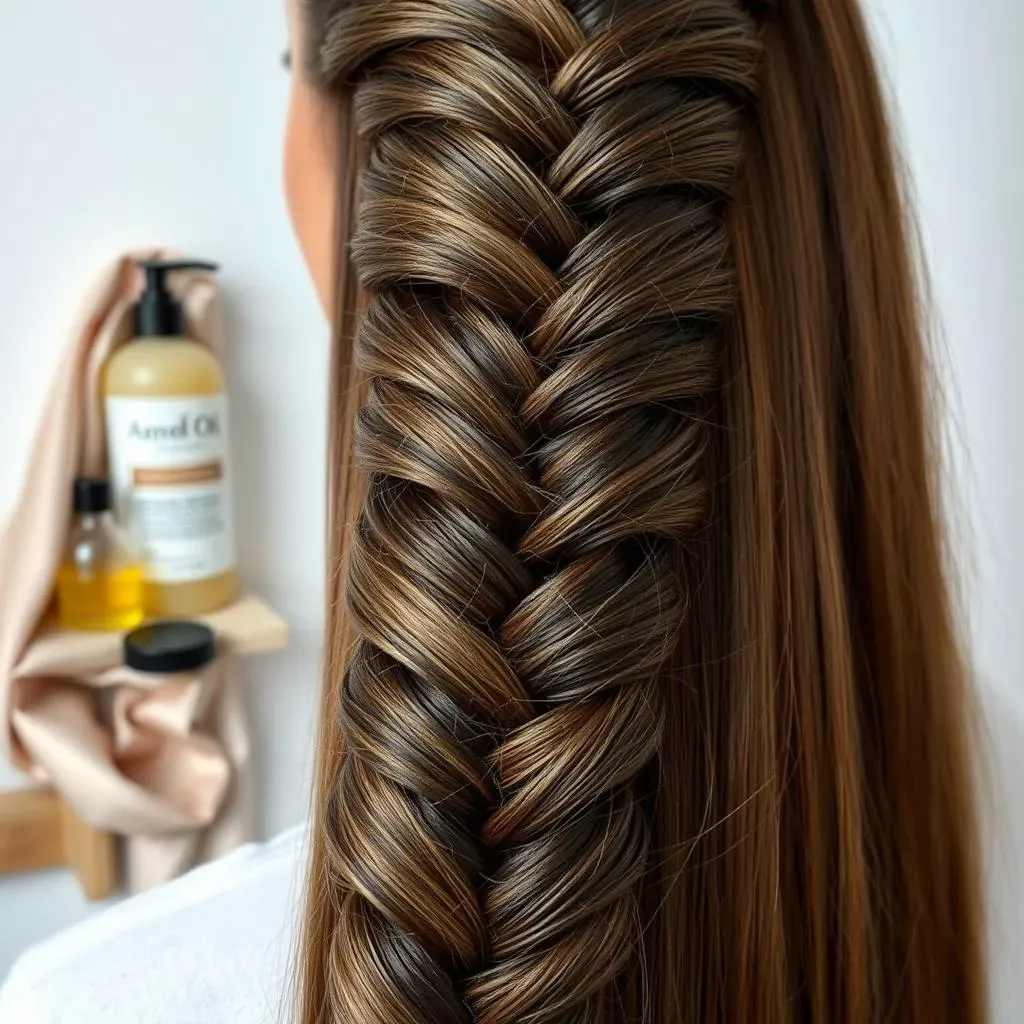
#1: Nighttime Care: Protecting Your Braid While You Sleep
let's talk beauty sleep – for your braid, that is! What you do while you're catching Z's can seriously impact the longevity and appearance of your single braid. Tossing and turning can create friction, leading to frizz, breakage, and a generally messy-looking braid. So, what's the solution? Silk or satin, my friend. Switching to a silk or satin pillowcase is a game-changer. These fabrics are much gentler on your hair than cotton, reducing friction and helping your braid stay smooth and intact.
Another option is to wrap your braid in a silk or satin scarf before bed. This provides an extra layer of protection and helps to minimize movement. Simply gather your braid and gently wrap the scarf around it, securing it at the base of your neck. If you're a particularly restless sleeper, you might also consider loosely braiding your hair before wrapping it. This will help to prevent tangles and knots from forming overnight. Trust me, your braid will thank you in the morning!
"A well-maintained braid is a happy braid."
#2: Washing and Hydrating: Keeping Your Braid Clean and Healthy
Now, let's address the elephant in the room: washing your hair with a braid. It can be a bit tricky, but it's definitely doable. The key is to focus on cleansing your scalp and allowing the shampoo to gently run down the length of the braid. Avoid scrubbing or bunching up the braid, as this can create tangles and frizz. Opt for a sulfate-free shampoo, as sulfates can strip your hair of its natural oils and leave it feeling dry and brittle.
After shampooing, it's essential to hydrate your hair. Apply a moisturizing conditioner to the length of the braid, focusing on the ends. Let it sit for a few minutes before rinsing thoroughly. You might also consider using a leave-in conditioner or hair oil to keep your braid hydrated between washes. Look for lightweight formulas that won't weigh your hair down or leave it feeling greasy. And remember, moderation is key. Over-washing can be just as damaging as under-washing, so aim to wash your hair only when it's truly necessary.
Care Aspect | Action | Product Recommendation |
|---|---|---|
Nighttime Protection | Use silk/satin pillowcase or wrap | Silk scarf, Satin bonnet |
Washing | Focus on scalp, gentle cleansing | Sulfate-free shampoo |
Hydrating | Condition length, leave-in treatment | Moisturizing conditioner, Hair oil |
#3: Avoiding Tension and Breakage: Gentle Handling is Key
Finally, let's talk about gentle handling. The way you treat your braid on a daily basis can have a big impact on its overall health and appearance. Avoid pulling or tugging on the braid, as this can cause tension and breakage. When styling your hair, be mindful of how the braid is positioned and avoid creating unnecessary strain. If you're wearing your braid up in a bun or ponytail, make sure the hair tie isn't too tight.
Regularly trim any split ends to prevent them from traveling up the hair shaft and causing further damage. And be patient when removing your braid. Gently unravel the braid, starting from the bottom and working your way up. Avoid yanking or pulling, as this can cause breakage and discomfort. With a little bit of care and attention, you can keep your single braid looking beautiful and healthy for longer. So, treat your braid with kindness, and it will reward you with its beauty and versatility!
Embrace the Simplicity and Elegance of One Hair Braid
From its humble beginnings to its modern-day interpretations, the single hair braid remains a style staple for its versatility and timeless appeal. Whether you’ve mastered the classic three-strand braid or experimented with intricate fishtails and waterfall variations, the key is to embrace the process and let your creativity shine. With practice and a little patience, you can effortlessly elevate your everyday look or create a stunning statement for any occasion. So, go ahead, experiment with textures, accessories, and placements – the world of the single braid is yours to explore. Embrace the simplicity, celebrate the elegance, and let your hair tell its own unique story.