
Table of Contents
So, you're ready for the amazing versatility and protective power of braids? Fantastic! But before you dive into that intricate braid pattern, there's a crucial step that often gets overlooked: preparing your hair. Knowing how to properly prep your hair for braids is the key to achieving a stunning style that lasts, and more importantly, keeps your hair healthy and thriving. This article is your ultimate guide to mastering the art of hair preparation before braiding. We'll walk you through every essential step, from the perfect cleansing routine to detangling and stretching techniques, ensuring your hair is ready for its braided transformation. We'll cover everything you need to know about preparing your hair for braids, whether you're a braiding pro or a complete beginner. Discover how to prevent breakage, maintain moisture, and achieve that sleek, polished look you've always dreamed of. Get ready to unlock the secrets to healthy, happy hair, and let's get started learning exactly how do I prepare my hair for braids! This comprehensive guide will help you confidently tackle this often-missed first step, ensuring your braiding experience is as enjoyable as the end result. Let's get started!
Prepping Your Hair for Braids: The Ultimate Guide
Prepping Your Hair for Braids: The Ultimate Guide
Why Proper Prep Matters
Think of your hair as the canvas for your braid masterpiece. A poorly prepped canvas leads to a messy, uneven painting, right? The same holds true for braids. If you don't take the time to prepare your hair properly, you risk ending up with a style that's not only less visually appealing but also potentially damaging to your hair. Taking the time to prep your hair ensures that your braids will look amazing and that your hair stays healthy throughout the process. This means less breakage, a happier scalp, and a style that lasts longer.
Proper hair preparation isn't just about aesthetics; it's about the long-term health of your hair. Braids, while protective, can put stress on your strands if they're not properly prepared. Think of it like this: if you were going to run a marathon, you wouldn't just jump in without training, would you? You'd prepare your body. Likewise, you should prepare your hair for the “marathon” of being braided.
Cleaning and Conditioning Your Hair
Before you even think about picking up a braiding tool, you need a squeaky-clean scalp and conditioned hair. Start with a clarifying shampoo to remove product buildup, dirt, and oil. Think of it as giving your hair a fresh start. This will ensure your braids have a solid foundation and won't be weighed down by product residue. Follow up with a deep conditioner to replenish moisture and strengthen your strands. This step is especially important if your hair is dry or damaged.
After cleansing and conditioning, consider a leave-in conditioner to seal in the moisture and provide extra protection. This will help prevent breakage and keep your hair soft and manageable during the braiding process. Remember, hydrated hair is happy hair, and happy hair braids beautifully! If you're unsure about what products to use, consult a stylist or do some research based on your hair type.
Product Type | Benefits | Considerations |
|---|---|---|
Clarifying Shampoo | Removes buildup | Use sparingly, may be drying |
Deep Conditioner | Adds moisture, strengthens | Leave on for recommended time |
Leave-in Conditioner | Seals in moisture, protects | Choose one suited to your hair type |
Detangling and Preparing for Braids
Now comes the crucial detangling phase. Use a wide-tooth comb or your fingers to gently work through any knots or tangles, starting from the ends and working your way up to the roots. This prevents breakage and ensures smooth, even braids. If you have particularly stubborn knots, consider using a detangling spray to make the process easier. Patience is key here; rushing can lead to unnecessary breakage.
Once your hair is completely detangled, you can choose to stretch it before braiding. This helps create a more polished, uniform look. You can stretch your hair using a variety of methods, including blow-drying, banding, or African threading. The method you choose will depend on your hair type and personal preference. Remember, the goal is to create a smooth, even base for your braids to sit upon.
"The key to amazing braids is preparation. Don't rush this process; take your time and your braids will thank you!" – [Insert Name of Hair Stylist or Expert Here]
Washing and Conditioning for Braids: Shampooing, Deep Conditioning, and More
The Power of a Clarifying Shampoo
Let's start with the foundation: a good, thorough clean. Before you even think about braiding, you need to wash away all the product buildup, dirt, and excess oils that have accumulated on your scalp and hair. This is where a clarifying shampoo comes in. Think of it as a power wash for your hair – it removes all the gunk, leaving your hair squeaky clean and ready for the next steps. Using a clarifying shampoo before braiding ensures your braids have a solid foundation and won't be weighed down by product residue. A clean scalp also promotes a healthier hair growth environment, reducing the risk of irritation or build-up under your braids. Don't skip this crucial first step!
Choosing the right clarifying shampoo is key. Look for one that's gentle enough to avoid stripping your hair of its natural oils, but effective enough to remove product buildup. Many clarifying shampoos are formulated for specific hair types, so finding one that matches your hair's needs is important. If you have a sensitive scalp, consider opting for a sulfate-free clarifying shampoo to minimize irritation. Remember, a clean scalp is a happy scalp, and a happy scalp is the key to healthy, long-lasting braids! If you're unsure what to choose, consult a hair professional for personalized advice.
Deep Conditioning: The Moisture Boost
Now that your hair is squeaky clean, it's time to replenish the moisture that the clarifying shampoo might have removed. Deep conditioning is crucial for maintaining healthy hair, especially before braiding. Think of it as a spa day for your hair – it helps to hydrate, strengthen, and protect your strands from damage. Deep conditioning is especially important if your hair is dry, damaged, or prone to breakage. A well-hydrated hair strand is more resilient, making it less prone to breakage during the braiding process.
There's a wide variety of deep conditioners available, each with its own unique properties and benefits. Some focus on hydration, while others prioritize strengthening or smoothing. When choosing a deep conditioner, consider your hair type and any specific concerns you may have. For example, if your hair is particularly dry, you might opt for a moisturizing deep conditioner. If your hair is damaged, you might choose one that contains protein to help repair broken bonds. Always follow the product instructions carefully for best results – and remember, patience is key!
Hair Type | Recommended Deep Conditioner |
|---|---|
Fine/Thin | Lightweight, moisturizing conditioner |
Thick/Coarse | Rich, creamy conditioner with strengthening properties |
Damaged/Dry | Deep conditioner with protein and moisturizing ingredients |
Detangling and Stretching Your Hair Before Braiding
Detangling and Stretching Your Hair Before Braiding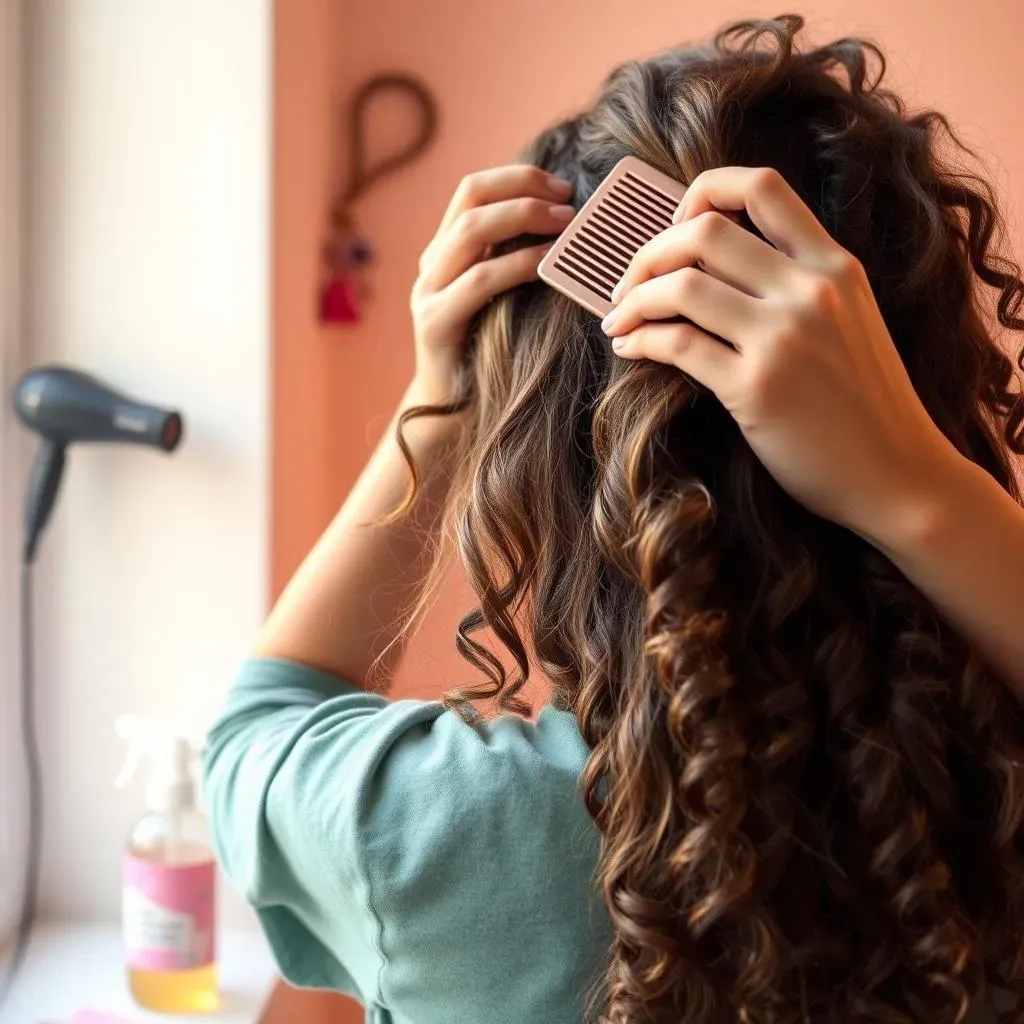
The Gentle Art of Detangling
Okay, let's talk detangling. This isn't just about making your hair look neat; it's about preventing breakage. Imagine trying to braid a tangled mess of yarn – it's frustrating and prone to snapping, right? The same applies to your hair. Start from the ends and work your way up to the roots, using a wide-tooth comb or your fingers (depending on your hair type and how tangled it is). If you have particularly stubborn knots, consider using a detangling spray to help loosen things up. Take your time; rushing this step will only lead to more frustration and potential damage. Remember, patience is a virtue, especially when dealing with delicate strands!
A good detangling technique is crucial for healthy hair and beautiful braids. For those with thicker, curlier hair, sectioning your hair into smaller parts before detangling can make the process much easier and less stressful on your strands. If you notice any particularly stubborn knots or tangles, be extra gentle to avoid pulling or breaking your hair. Using a leave-in conditioner while detangling can also help to lubricate the hair, making the process smoother and less likely to cause damage. If you're struggling, don't hesitate to ask a friend or professional stylist for help!
Stretching Your Hair: Different Methods
Now that your hair is gloriously detangled, it's time to consider stretching it. Stretching your hair before braiding helps create a smoother, more uniform look, making the braiding process easier and the final result more polished. There are several ways to stretch your hair, each with its own pros and cons. Blow-drying with a diffuser attachment is a popular method, offering gentle stretching without excessive heat damage. If you're using heat, always apply a heat protectant spray beforehand. Another option is banding, where you use hair ties to gently stretch the hair in sections. This method is gentler than blow-drying but can take longer.
The best method for stretching your hair really depends on your hair type and personal preference. Experiment with different techniques to find what works best for you. For example, if you have fine hair, you might prefer a gentler method like banding to avoid heat damage. If your hair is thicker and coarser, blow-drying might be a more efficient option. Remember, the goal is to create a smooth, even base for your braids. Don't over-stretch your hair, as this can also lead to damage. Aim for a comfortable level of stretch that makes braiding easier without compromising the health of your hair. If you're unsure, consult a stylist for personalized guidance.
Method | Pros | Cons |
|---|---|---|
Blow-drying | Fast, effective | Can cause heat damage if not done carefully |
Banding | Gentle, no heat | Time-consuming |
African threading | Very gentle, long-lasting stretch | Requires skill and practice |
Preparing for the Braid: The Final Touches
With your hair clean, detangled, and stretched, you're almost ready for the braiding magic to begin! Before you start braiding, take a moment to assess your hair one last time. Are there any remaining tangles or knots? Does your hair feel adequately moisturized? If you find any lingering issues, address them now before you start braiding. Once you start braiding, it becomes more difficult to fix any problems. It's much easier to address issues now than to try to fix them later, possibly causing damage in the process. A little extra time spent on preparation will pay off in the end.
Consider using a light-hold styling product to help keep your hair smooth and manageable during braiding. A light mousse or styling cream can help to keep frizz at bay and make the braiding process easier. Avoid using heavy products that might weigh your hair down or leave behind residue. Remember, the goal is to create a smooth, polished look that lasts. Once you've completed your prep work, you're finally ready to start braiding! Enjoy the process and remember to take your time, ensuring each braid is neat and even. And if you're feeling overwhelmed, remember that there's no shame in seeking professional help.
"The best braids start with the best preparation. Don't skip the steps, and you'll be rewarded with a stunning style." - [Insert Name of Hair Stylist or Expert Here]
Protecting Your Hair and Scalp: Avoiding Damage and Promoting Growth
Protecting Your Hair and Scalp: Avoiding Damage and Promoting Growth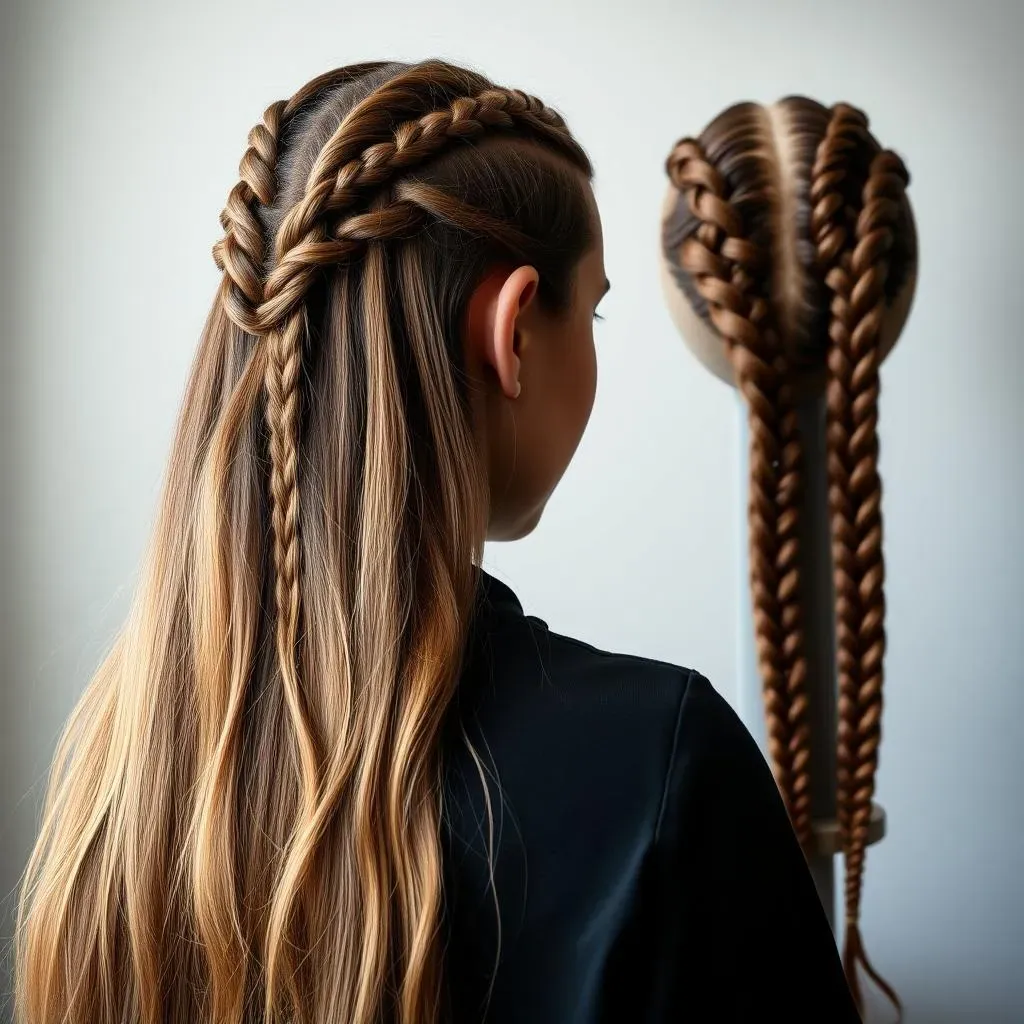
Avoiding Tight Braids: The Root of the Problem
One of the biggest culprits of braid-related hair damage is, you guessed it, tight braids! Think of your hair follicles as delicate flowers; too much pressure can damage them, leading to breakage, hair loss, and even scalp irritation. When braids are too tight, they pull on the hair follicles, causing stress and potentially leading to traction alopecia, a type of hair loss caused by excessive pulling or tension on the hair. So, how tight is too tight? A good rule of thumb is that you should be able to comfortably run your fingers along your scalp beneath the braids without feeling any significant pulling or tension. If it hurts, it's too tight!
Remember, braids should be a stylish and protective hairstyle, not a source of pain or damage. Communicating your concerns about tightness to your braider is crucial, especially if you're getting your braids professionally done. It's important to find a skilled and experienced braider who understands the importance of proper tension. Don't be afraid to speak up and ask for adjustments if something feels off. Your hair's health should always be a top priority. If you're braiding your own hair, be extra mindful of the tension you're applying. Take frequent breaks and adjust the braids as needed to ensure comfort and prevent damage.
Scalp Care: Keeping it Happy and Healthy
While braids are protective styles, they can still trap dirt, oil, and sweat against your scalp, leading to build-up and potential issues. A clean scalp is crucial for preventing irritation, itching, and other scalp problems. Make sure to regularly cleanse your scalp, even while your hair is in braids. You can do this by using a gentle scalp cleanser or a diluted apple cider vinegar rinse to remove build-up. Many people find that using a spray bottle to apply the cleanser directly to the scalp, followed by gentle massage, is effective. This helps to keep the scalp clean and healthy, preventing issues that can arise from build-up under your braids.
Keeping your scalp moisturized is equally important. A dry, flaky scalp can be itchy and uncomfortable, especially under braids. Applying a light scalp oil or moisturizer can help to keep your scalp hydrated and prevent dryness. Look for natural oils like coconut oil or jojoba oil, which are known for their moisturizing and anti-inflammatory properties. Remember, a happy scalp contributes to healthy hair growth, so don't neglect this important aspect of your hair care routine. Regular scalp massages can also improve blood circulation, promoting hair growth and overall scalp health. Consider incorporating this into your routine for an added boost of scalp care.
Scalp Issue | Solution |
|---|---|
Dryness/Flaking | Moisturizing scalp oil or cream |
Itching/Irritation | Gentle scalp cleanser, anti-fungal treatment (if needed) |
Build-up | Clarifying scalp wash, diluted apple cider vinegar rinse |
Maintaining Your Braids: Extending Their Lifespan
Even with the best preparation, your braids will eventually need some TLC. To keep your braids looking their best and prevent damage, avoid sleeping on cotton pillowcases, which can absorb moisture from your hair and lead to dryness and breakage. Opt for a satin or silk pillowcase instead. These materials are much gentler on your hair and help to keep it moisturized throughout the night. Additionally, be gentle when washing your hair, avoiding harsh scrubbing or pulling on the braids. Use a sulfate-free shampoo and conditioner to prevent stripping your hair of its natural oils and to maintain moisture.
Regularly check your braids for any loose strands or areas of tension. If you notice any problems, address them promptly to prevent further damage. Consider using a braid spray to keep your braids moisturized and looking their best. And remember, even protective styles need a break. After a few weeks or months, take down your braids and give your hair and scalp some time to rest and recover before installing a new set. This will help to prevent damage and promote healthy hair growth. Taking breaks between protective styles is crucial for maintaining the overall health of your hair and scalp.
"Treat your braids like a precious jewel, and they'll reward you with beauty and longevity." - [Insert Name of Hair Stylist or Expert Here]