Table of Contents
Ever scrolled through Instagram and been stopped in your tracks by a seriously cool hairstyle? I have, and lately, it's been all about the hairstyle jayda wayda braids. These aren't your average braids; they're bold, they're chic, and they've got everyone talking. We're going to break down everything you need to know about this trending look. First, we'll explore what makes Jayda Wayda braids so unique. Then, we'll get into the nitty-gritty of how to actually create these braids yourself, even if you're a beginner. But, it doesn't stop there; we'll also look at some cool ideas you can try, from adding curls to playing with different colors. Finally, we'll cover the crucial part: how to keep your braids looking fresh and fabulous. Ready to level up your braid game? Let's get started and see how you can rock the hairstyle jayda wayda braids.
Understanding the Jayda Wayda Braids Trend
Understanding the Jayda Wayda Braids Trend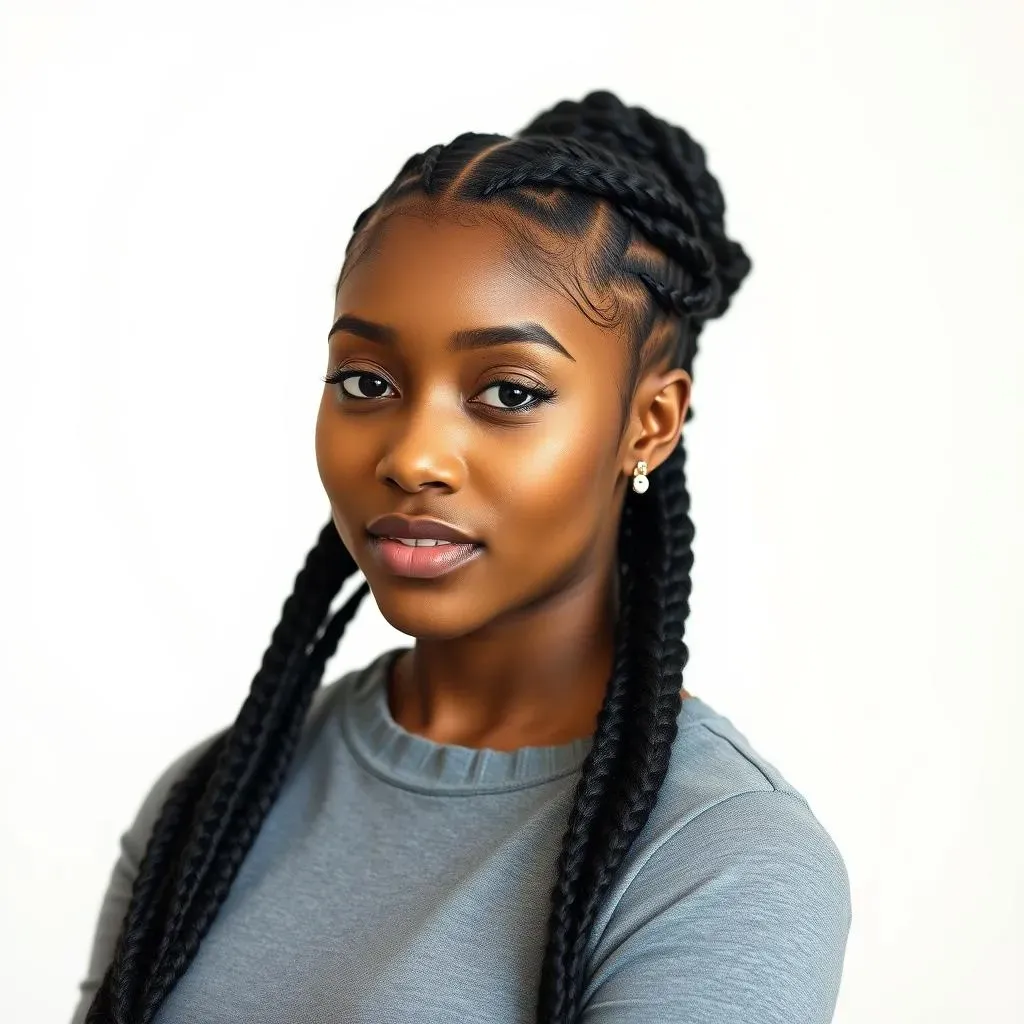
The Rise of a Style Icon
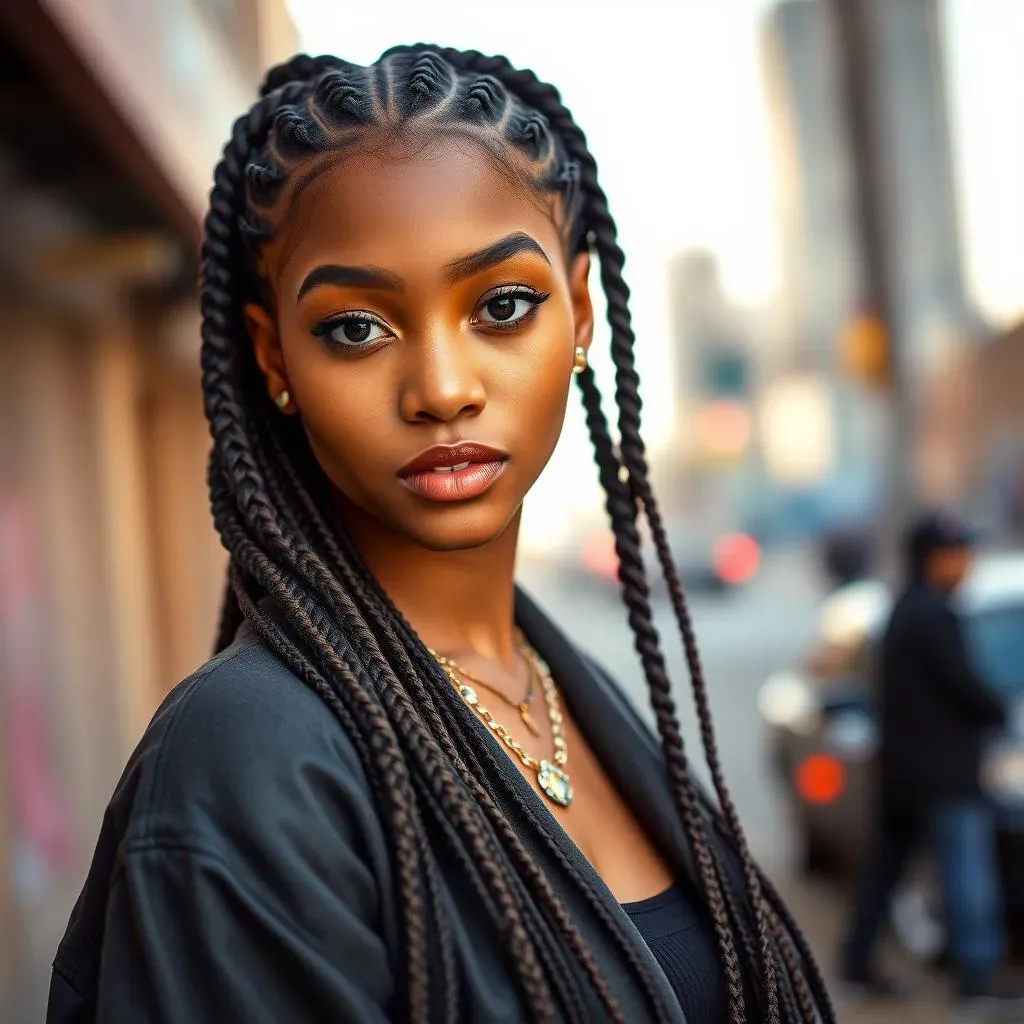
So, who exactly is Jayda Wayda, and why are her braids such a big deal? Well, she's not just some random person on the internet. She's a total style influencer and entrepreneur who's known for her bold fashion choices, and her hair is always on point. Her signature look? Long, chunky braids that make a statement. These aren't your typical schoolgirl braids; they're a whole vibe. Think of them as the cool, rebellious cousin of regular braids, and they've quickly become a must-try for anyone wanting to add some edge to their look.
This style isn't just about looking good; it’s about expressing yourself. Jayda's braids have become a symbol of confidence and individuality, and it’s no wonder they've blown up on social media. People are drawn to the simplicity, the versatility, and the sheer coolness of the style. It’s a look that says, "I'm here, and I'm making a statement," and that's something a lot of people are looking to achieve. It’s not just a hairstyle; it’s a whole mood.
Key Elements of the Look
What exactly makes a Jayda Wayda braid, well, a Jayda Wayda braid? It's all about the size and the number. Typically, you’ll see five large, chunky braids, two framing the face and three in the back. The braids are usually long and thick, giving them a dramatic, almost rope-like appearance. This isn't about intricate patterns or tiny braids, it's about making a big impact with fewer, bolder elements. It's the kind of look that's both easy to achieve and super eye-catching.
And while five braids are the most common, the beauty of this style is that you can totally make it your own. Some people go for four, some for six, and others might add some colorful extensions or embellishments. It’s all about experimenting and finding what works best for you. The key is to keep the braids big and chunky, and to wear them with confidence. That's what makes a Jayda Wayda braid so iconic.
Jayda Wayda Braids vs. Other Styles
You might be thinking, "Okay, but how is this different from other braided styles?" That’s a fair question. While there are similarities to other looks, like Coi Leray braids, there are key differences that set Jayda Wayda braids apart. Coi Leray braids tend to be smaller, more numerous, and often include intricate patterns. Jayda Wayda braids, on the other hand, are all about that bold simplicity. They're bigger, chunkier, and make a more direct statement.
Think of it this way: Coi Leray braids are like a finely detailed painting, while Jayda Wayda braids are like a bold, graphic print. Both are beautiful, but they have very different vibes. Jayda's style is also more versatile; you can dress it up or down, wear it to a party, or just rock it on a casual day. It's a style that fits into almost any situation and makes you feel like you own the room. Ultimately, it's this unique combination of boldness and simplicity that makes Jayda Wayda braids so popular.
Key Differences
- Jayda Wayda Braids: Fewer, larger, chunky braids; typically five in total.
- Coi Leray Braids: More numerous, smaller braids; often with intricate patterns.
- Other Braided Styles: Wide variety of sizes and patterns; can be very small or very large.
Mastering the Technique: How to Do Jayda Wayda Braids
Mastering the Technique: How to Do Jayda Wayda Braids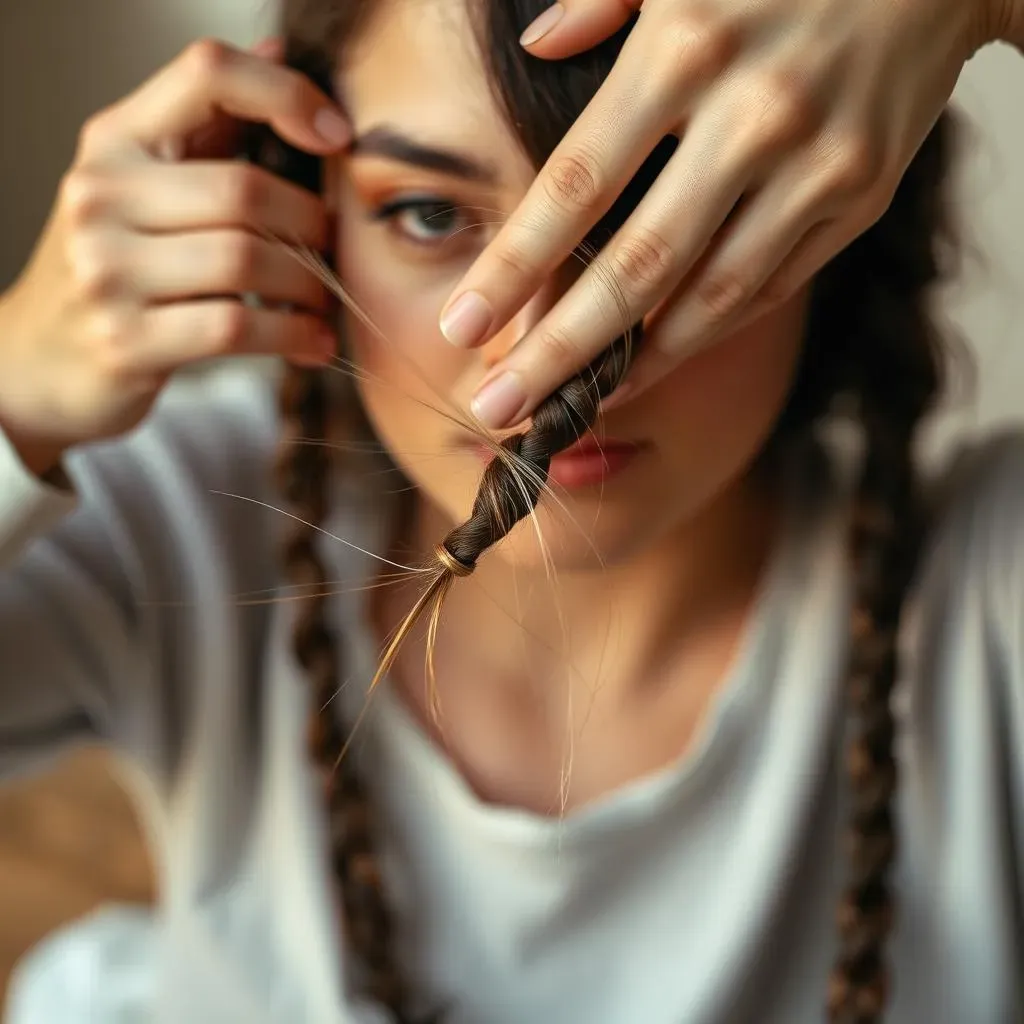
Prep Work: Getting Ready to Braid
Okay, so you're ready to try the Jayda Wayda braid, that's great! First things first, let's talk about prepping your hair. You'll want to start with clean, detangled hair. This makes the braiding process way easier and helps your braids look smoother. Think of it like prepping a canvas before painting; you wouldn't start with a dirty surface, would you? Next, section your hair into five equal parts. This is super important because it's what gives the Jayda Wayda braids their signature look. Use clips or hair ties to keep those sections separate, so you don't accidentally grab hair from the wrong section. Trust me, it'll save you a headache later.
Now, before you even pick up a piece of hair, decide if you're going for a super sleek look or something a bit more relaxed. If you want a sleek style, you might want to use some edge control or a light gel to smooth down any flyaways. If you're going for a more casual vibe, you can skip that step. It's all about what makes you feel good. And don't forget your braiding hair. You'll need enough to make those braids nice and chunky, so make sure you have enough on hand before you get started. Having everything prepped and ready to go makes the whole process go a lot smoother.
The Braiding Process: Step-by-Step
Alright, now for the fun part – the actual braiding! Start with one of your five sections. Divide that section into three smaller pieces, just like you would for a regular braid. Now, begin braiding, and make sure you're keeping the tension consistent. You don't want some braids to be super tight and others to be loose. Consistency is key here. The goal is to create a braid that's thick and even all the way down. As you braid, you can add in braiding hair to give it that extra chunkiness. This is where the magic happens, and you'll really start to see the Jayda Wayda braid taking shape.
Once you reach the end of the braid, secure it with a hair tie. You can use clear elastics for a seamless look, or you can use colorful ones to add a pop of fun. Repeat this process for all five sections. Remember, practice makes perfect, so if your first braid isn't amazing, don't get discouraged. Keep going, and you'll get the hang of it. And there you have it, you've just created your very own Jayda Wayda braids. It's a process, but it's totally worth it when you see the final result!
Essential Tools
- Wide-tooth comb for detangling
- Hair clips or ties for sectioning
- Braiding hair (amount depends on desired thickness)
- Hair ties or elastics to secure braids
- Optional: Edge control or light gel
Tips for Beginners
If this is your first time trying Jayda Wayda braids, don't stress! It's okay if it doesn't look perfect right away. Start by practicing on just one section of your hair to get the hang of it. This will help you get comfortable with the braiding process before you tackle your whole head. Also, don't be afraid to watch some video tutorials. Seeing someone else do it can be incredibly helpful and can make the process easier to understand. There are tons of great tutorials out there that can walk you through each step.
Another tip: don't braid your hair too tightly. Tight braids can cause tension and might lead to breakage. You want your braids to be secure, but not so tight that they hurt your scalp. And finally, take your time! Don't rush the process. The more time you take, the better your braids will look. It's all about being patient and enjoying the process. Remember, everyone starts somewhere, and with a little practice, you'll be braiding like a pro in no time.
“The key to great braids is patience and practice. Don't be afraid to experiment and find what works best for you.” - Expert Braider
Creative Variations: Exploring Different Jayda Wayda Braids Hairstyles
Creative Variations: Exploring Different Jayda Wayda Braids Hairstyles
Adding a Touch of Color
Okay, so you've got the basic Jayda Wayda braid down, but what if you want to spice things up a bit? Let's talk color! Adding colorful braiding hair is a super easy way to make your style pop. You can go for a subtle ombre effect, where the color gradually changes from the roots to the tips, or you can go bold with bright, contrasting colors. Think neon pink, electric blue, or even a mix of rainbow hues. The possibilities are endless! It's like adding a splash of paint to a canvas, instantly transforming the look from classic to something totally unique.
I've seen people rock all sorts of color combos, from natural browns and blondes to vibrant purples and greens. The key is to pick colors that make you feel confident and express your personality. Don't be afraid to experiment and try something new. You can even mix and match different colors within the same braid for a multi-dimensional effect. It's a great way to make your braids stand out and show off your creative side. Trust me, a little color can go a long way in making your Jayda Wayda braids truly your own.
Playing with Parts and Patterns
Now, let's talk about mixing it up with parts and patterns. The classic Jayda Wayda style features a middle part with two braids framing the face and three in the back. But who says you have to stick to the rules? You can try a side part for a more asymmetrical look, or even go for a zigzag part for something a little edgier. The way you part your hair can completely change the overall vibe of the style. It's all about experimenting and seeing what works best for your face shape and personal preference. It's like rearranging furniture in a room; a small change can make a big difference.
And it doesn't stop with the part. You can also play around with the way you braid the hair. Instead of a standard three-strand braid, you can try a fishtail braid, a Dutch braid, or even a rope braid. Each of these techniques will give your Jayda Wayda braids a slightly different look and feel. You can also experiment with adding small braids or twists into the mix for a more intricate design. It's like adding different ingredients to a recipe; each one brings something new to the table. Don't be afraid to get creative and explore different braiding patterns to make your style truly unique.
Variation | Description | Vibe |
|---|---|---|
Ombre Color | Color gradually changes from roots to tips. | Subtle, Stylish |
Contrasting Colors | Bold, bright colors that stand out. | Playful, Edgy |
Side Part | Part hair to one side instead of the middle. | Asymmetrical, Chic |
Zigzag Part | Part hair in a zigzag pattern. | Unique, Edgy |
Fishtail Braids | Use fishtail braid technique. | Intricate, Detailed |
Adding Curls and Accessories
Want to add even more personality to your Jayda Wayda braids? Let's talk curls and accessories! Adding curls to the ends of your braids is a great way to soften up the look and add some movement. You can use a curling iron or flexi rods to create bouncy curls or loose waves, depending on your preference. The contrast between the straight braids and the curly ends gives the style a playful and feminine touch. It's like adding a bit of frosting to a cake; it just makes it that much sweeter.
And then there are accessories! Hair clips, beads, and even small scarves can take your Jayda Wayda braids to the next level. You can add some sparkly clips for a touch of glam, or use wooden beads for a more bohemian vibe. Small scarves can be wrapped around the base of the braids or woven throughout for a pop of color and texture. It's like adding jewelry to an outfit; it's the finishing touch that can make all the difference. Don't be afraid to experiment and find accessories that reflect your personal style. The key is to have fun and make your Jayda Wayda braids your own.
“The beauty of Jayda Wayda braids is that they're a blank canvas. Don't be afraid to experiment and make them your own.” - Hair Enthusiast
Maintaining and Caring for Your Jayda Wayda Braids Hairstyle
Maintaining and Caring for Your Jayda Wayda Braids Hairstyle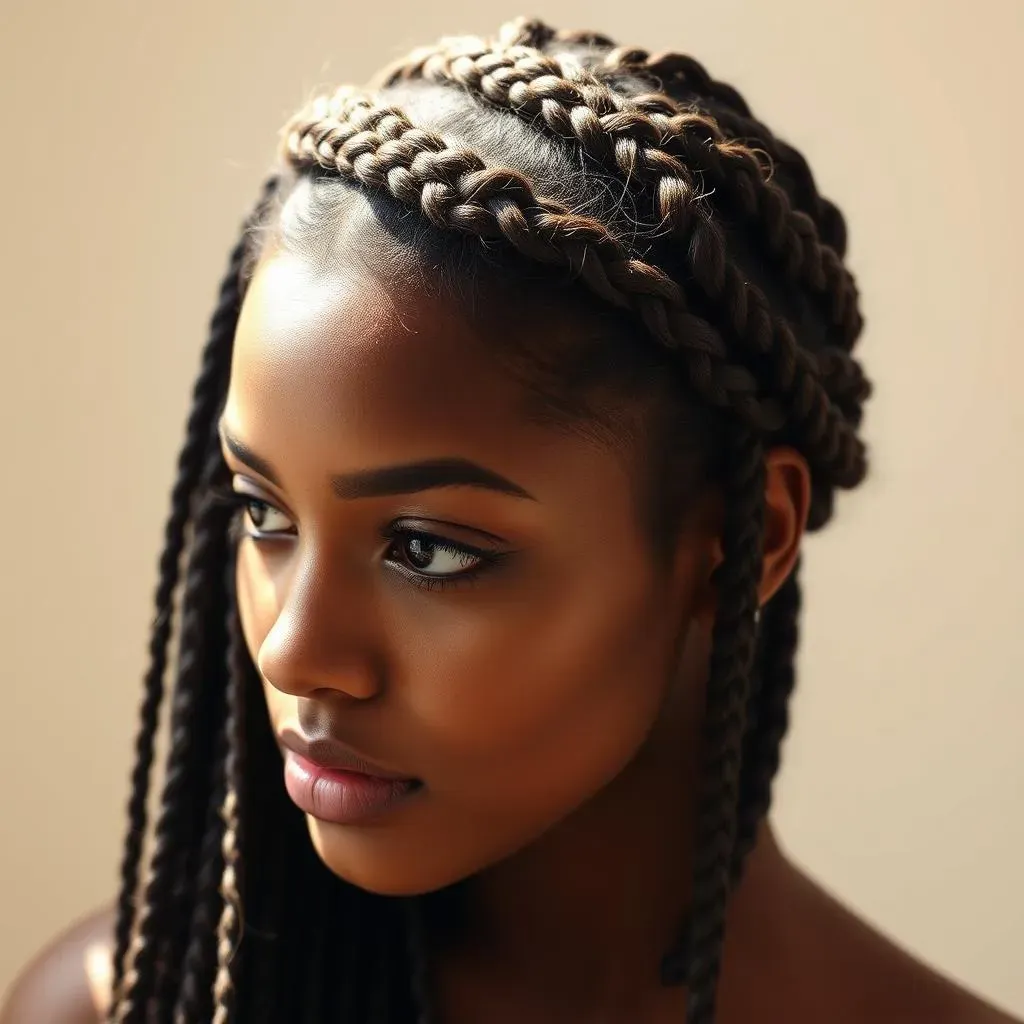
Nighttime Routine for Braids
Okay, so you've got your fabulous Jayda Wayda braids, and you want them to stay looking fresh, right? The secret is in your nighttime routine. Think of it like tucking yourself in for the night, you need to do the same for your braids. First things first, get yourself a silk or satin scarf or bonnet. Cotton can actually dry out your hair, causing frizz and breakage, and no one wants that. Silk or satin helps to keep the moisture in and reduces friction. It's like giving your braids a cozy little bed to sleep in.
Before you put on your scarf or bonnet, gently gather your braids and loosely tie them up into a low ponytail or bun. This keeps them from getting tangled and helps to preserve their shape. Don’t make it too tight, though; you want them to be comfortable. And while you’re at it, try to avoid sleeping directly on your braids. Tossing and turning can cause them to rub against your pillow, leading to frizz. It might take a little practice to get used to, but trust me, your braids will thank you for it. It's all about being gentle and mindful of your hair while you sleep.
Daily Care Tips
So, your braids are looking great after a good night’s sleep, but what about during the day? Well, there are a few things you can do to keep them looking their best. First, avoid over-manipulating your braids. The more you touch them, the more likely they are to get frizzy. Think of it like a delicate flower; you want to admire it, not constantly poke and prod it. If you notice any flyaways, you can gently smooth them down with a little bit of edge control or a light hair oil. But remember, a little goes a long way; you don’t want to make your braids greasy.
Also, pay attention to your scalp. A dry, itchy scalp can be a real pain, and it can also affect the health of your braids. Use a light hair oil or a scalp moisturizer to keep your scalp hydrated. You can apply it directly to your scalp using your fingertips or a cotton swab. And, of course, keep your braids clean. You can gently wash them with a mild shampoo, but be sure to dilute it with water and focus on cleansing your scalp. Avoid scrubbing too hard, and rinse thoroughly. It's all about being gentle and consistent with your daily care routine.
Care Task | Frequency | Product |
|---|---|---|
Nighttime Protection | Every Night | Silk/Satin Scarf or Bonnet |
Scalp Moisturizing | 2-3 times a week | Light Hair Oil or Scalp Moisturizer |
Gentle Cleansing | Every 1-2 weeks | Mild, Diluted Shampoo |
Flyaway Control | As Needed | Edge Control or Light Hair Oil |
When to Refresh or Remove
Okay, so you’ve been taking great care of your Jayda Wayda braids, but nothing lasts forever. Eventually, you’ll need to either refresh them or take them out. How do you know when it’s time? Well, it depends on a few things. If your braids are starting to look frizzy, loose, or your scalp is feeling irritated, it might be time for a refresh. You can refresh your braids by re-braiding any loose sections or adding some new braiding hair to areas that look worn. It's like giving your braids a little tune-up to keep them going.
But if your braids are starting to slip, or you're noticing a lot of new growth, it's probably time to remove them. Leaving your braids in for too long can cause breakage and damage to your natural hair. When you remove your braids, be gentle and take your time. Don’t just rip them out; you want to minimize any stress on your hair. You can use a little bit of oil to help loosen the braids and make the removal process easier. And once your braids are out, give your hair a good wash, condition, and deep treatment. It's like giving your hair a well-deserved spa day after working so hard. It's all about listening to your hair and giving it what it needs.
“Taking care of your braids is like taking care of a plant; with the right care, it will thrive. Be gentle, be consistent, and your braids will reward you.” - Hair Care Expert