
Table of Contents
Ever wondered how to take your braid game to the next level? Forget two braids; it's time to explore the world of 3 braids hairstyles! This isn't just about adding another strand, it’s about unlocking a whole new dimension of style and creativity. From the simple elegance of a classic three-strand braid to the intricate designs you can create with French and Dutch braiding techniques, we’re going to cover it all. Think of this guide as your personal braiding bible, where we'll show you how to master basic 3 braids, explore different variations, and even combine braids for unique looks. We’ll also share the secrets to keeping your 3 braids looking fresh and fabulous. Whether you're a braiding beginner or a seasoned pro, get ready to learn how to create stunning 3 braids hairstyles that will turn heads and boost your confidence. Let's get braiding!
The Classic ThreeStrand Braid and Its Variations
The Classic ThreeStrand Braid and Its Variations
The Foundation: Mastering the Basic Three-Strand Braid
so you’re diving into the world of 3 braids hairstyles? Awesome! Let's start with the OG of braids: the classic three-strand. It's like the alphabet of braiding, and once you nail it, you can build practically anything. It’s super simple—you just divide your hair into three sections, and then cross the right section over the middle, and then the left section over the new middle, and just keep going. Seriously, that's it. It's all about keeping the tension even and your sections separate. Think of it like weaving a little basket, but with hair. Don't worry if it looks messy at first; practice makes perfect. I remember my first braid looked more like a tangled mess. But hey, we all start somewhere, right?
This braid isn't just a starting point; it's a versatile tool. It’s your go-to for quick and easy styles, and it’s also the base for more complex designs, that we will see later. This braid is a classic for a reason; it's timeless, it’s elegant, and it works for almost any hair type and length. You can wear it down your back, to the side, or even incorporate it into a bun or updo. The possibilities are endless. The beauty of this braid is in its simplicity. Once you understand the basic mechanism, you'll see how easy it is to adapt and style it in various ways.
Exploring Variations: Beyond the Basic Braid
Now that you’ve got the basic three-strand down, let's spice things up! Think of this braid as a blank canvas. You can play with the size of the sections – larger sections for a chunkier braid, smaller for a more delicate look. You can add ribbons or scarves into the braid, weaving them in with the hair for a pop of color. I once did a braid with a bright pink ribbon for a music festival, and it was a total hit! And what about the tension? Try braiding loosely for a relaxed, bohemian vibe, or pull it tight for a sleek, polished finish. It’s amazing how a few little tweaks can totally change the look and feel of the braid.
There are also so many ways to start and end this braid. You could start with a high ponytail and braid down, or begin at the nape of your neck for a low braid. Instead of just tying it off at the end, you can create a loop to make a cute little bun, or do a fishtail style for a more intricate finish. The key is to experiment and see what works best for you. Don't be afraid to play around and get creative. It’s all part of the fun. The three-strand braid is a journey, not a destination and the possibilities are limited only by your imagination.
Variation | Description | Style Tip |
|---|---|---|
Chunky Braid | Use larger hair sections. | Perfect for a relaxed, casual look. |
Ribbon Braid | Weave in a ribbon as you braid. | Adds color and texture. |
Loose Braid | Braid with relaxed tension. | Ideal for a bohemian or beachy vibe. |
Tight Braid | Braid with firm tension. | Creates a sleek, polished look. |
Elevating Your Look with 3 Braids: French and Dutch Techniques
Elevating Your Look with 3 Braids: French and Dutch Techniques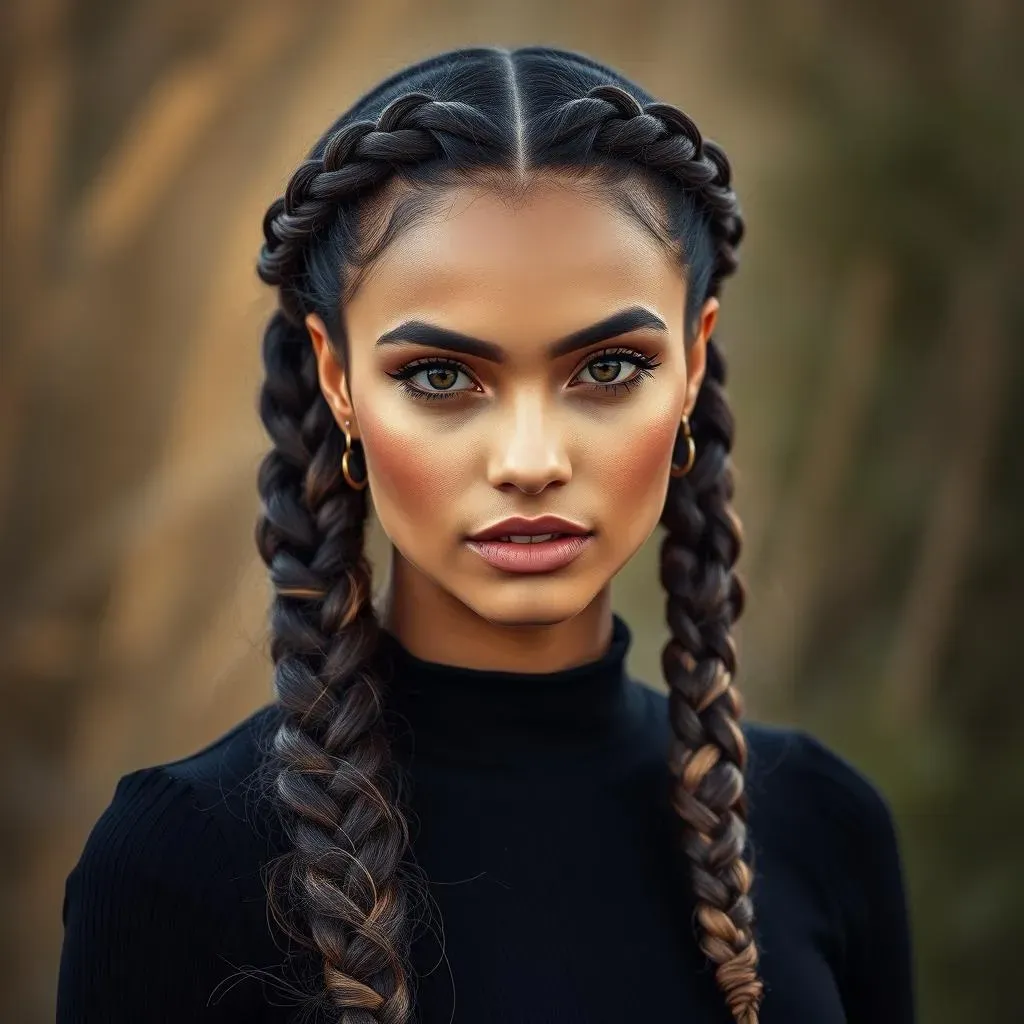
French Braid: The Elegant Updo
Ready to take your braiding to the next level? Let’s talk French braids. These aren't your basic three-strand braids; they’re like the sophisticated cousin, adding a touch of elegance to any look. The key to a French braid is that you're gradually incorporating more hair as you go. You start with a small section at the crown of your head, divide it into three, and then, as you braid, you pick up small sections of hair from the sides and add them to the braid. It’s like the braid is hugging your head as it goes down. I always thought it looked super complicated, but honestly, it just takes practice. And once you get the hang of it, it’s a game changer. It can make even a bad hair day look like a deliberate style statement.
French braids are incredibly versatile, too. You can do one down the back of your head, two for a classic schoolgirl look (but make it fashion), or even create a French braid crown for something a bit more fancy. It’s all about where you start and how you finish it. You can also play with the tightness of the braid. A tighter braid looks more polished, while a looser braid gives off a more relaxed vibe. It’s amazing how one technique can offer so many different looks. And here's a little secret: a little bit of hairspray can be a lifesaver for keeping those little flyaways in check. Trust me, I've been there.
Dutch Braid: The Bold and Beautiful
Now, let’s flip things around with the Dutch braid. If the French braid is the elegant cousin, the Dutch braid is its bolder, more rebellious sibling. The process is very similar to the French braid, but instead of adding hair over the middle strand, you add it under. This simple change makes the braid stand out, creating a raised, almost three-dimensional effect that sits on top of your head. It’s like the braid is popping out, rather than lying flat. I think it looks super cool, especially if you want to make a statement. Plus, it’s a great way to show off your hair color or highlights. A Dutch braid can really make your hair the star of the show.
Like the French braid, Dutch braids are super versatile. You can do a single Dutch braid down the back, two for a sporty vibe, or even incorporate them into more elaborate styles. You can start with a side part for a more edgy look, or do a double Dutch braid that meets at the back of your head for a cool updo. And, just like with the French braid, you can play with the tension, the size of the sections, and the placement of the braid to create different effects. Don't be afraid to experiment and see what works best for your hair type and style. It’s all about having fun and expressing yourself.
Braid Type | Technique | Look | Best For |
|---|---|---|---|
French Braid | Add hair over the middle strand | Elegant and sophisticated | Formal events, polished looks |
Dutch Braid | Add hair under the middle strand | Bold and defined | Casual styles, showing off hair color |
Creative 3 Braids Hairstyles: Combining Braids for Unique Looks
Creative 3 Braids Hairstyles: Combining Braids for Unique Looks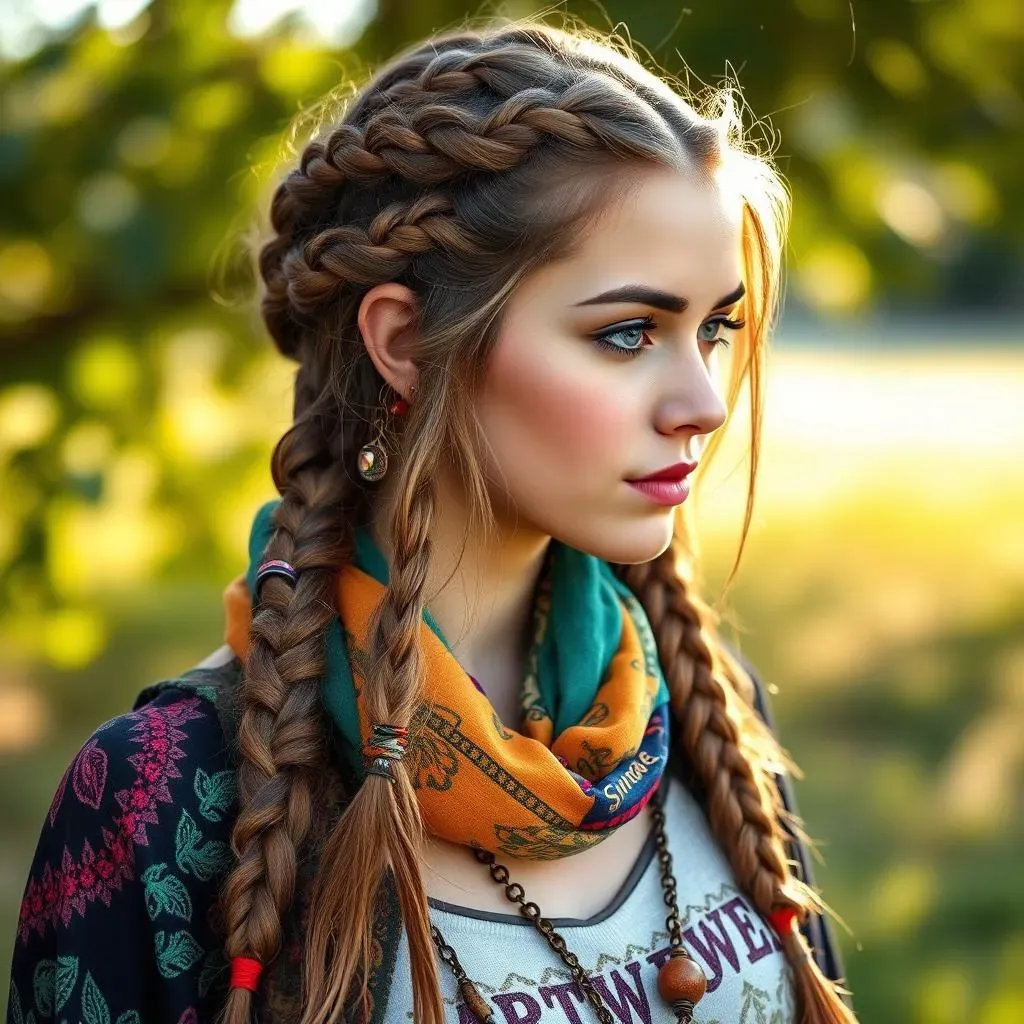
Mixing and Matching Braids: Unleashing Your Creativity
so you've mastered the individual braids, now it's time for the real fun: combining them. This is where you can truly let your creativity shine. Think of it like mixing paint colors; you can create something totally new by combining different types of braids. Ever thought about starting with a French braid at the crown and then transitioning into two standard three-strand braids down the back? It’s a simple yet effective way to add a bit of flair. Or, how about a Dutch braid on one side of your head, leading into a regular three-strand braid on the other? The asymmetry can make your look so unique. I remember trying a style like this for a party, and everyone was asking me how I did it. It felt pretty cool, I won't lie.
The trick here is to not be afraid to experiment. You can braid a section of your hair into a tight cornrow and then continue it into a loose three-strand braid. You can also take a small section of your hair and braid it into a tiny, delicate three-strand braid and then incorporate it into a larger French braid. The combinations are literally endless. It’s like you’re building a sculpture with hair, and each combination creates a new masterpiece. The key is to think about how the textures and patterns of different braids can complement each other. It’s all about playing around and discovering what works best for you. And honestly, even if it doesn’t turn out exactly as you planned, it’s still part of the fun.
Advanced Techniques: Adding Twists and Turns
Ready to take things up a notch? Let’s talk about adding twists and turns to your combined braid creations. This is where you can really get into the details and add a touch of sophistication. Imagine starting with two Dutch braids that curve around your head and then meet at the back, transitioning into a single, thick three-strand braid. This creates a stunning, almost crown-like effect. Or, how about incorporating a rope twist into your braid? You can take a section of your hair, twist it tightly, and then weave it into your braid for added texture and dimension. It’s like adding extra layers to your design, making it more interesting and visually appealing. It might sound complicated but the result is always worth it.
Another fun technique is to create a braided updo by combining several different braid styles. You can do a series of small cornrows that lead to a larger Dutch braid, which is then pinned into a bun. This creates a textured and intricate look that’s perfect for special occasions. Or, you can do multiple three-strand braids, then twist them together to make a braided bun. The key here is to think of your hair as a canvas and use different braid techniques to create unique patterns and shapes. Don't worry if it takes a few tries to get it right; practice makes perfect. The more you experiment, the more comfortable you’ll become with these advanced techniques, and the more unique your styles will be. It’s all about pushing your boundaries and having fun with it.
Combination Style | Description | Technique | Best For |
|---|---|---|---|
French to Three-Strand | French braid transitions into two three-strand braids. | Start with French braid, then split into two. | Everyday style, adds flair to simple look. |
Dutch and Three-Strand Combo | Dutch braid on one side, standard braid on other. | Create asymmetry with different braid types. | Edgy, unique look. |
Cornrows to Three-Strand | Tight cornrows transitioning into loose braids. | Use cornrows for intricate patterns. | Detailed designs, showcasing skill. |
Braided Updo | Multiple braids combined into a bun. | Combine smaller braids into larger ones, then pin. | Special occasions, textured look. |
Caring for Your 3 Braids: Maintenance and Styling Tips
Caring for Your 3 Braids: Maintenance and Styling Tips
Keeping Your Braids Fresh: Daily Care
so you've spent time and effort creating these awesome 3 braids hairstyles, right? Now, it's crucial to keep them looking their best. Think of your braids like a delicate plant; they need a little TLC to thrive. First things first, protect them at night. Tossing and turning can cause frizz and breakage, so a silk or satin scarf or bonnet is your best friend. These materials reduce friction and help keep your braids smooth. I remember when I first started braiding, I'd wake up with a tangled mess. The scarf was a total game-changer! Also, try not to handle your braids too much during the day. The more you touch them, the more likely they are to get frizzy. Keep your hands off, and your braids will thank you.
Another key part of daily care is moisturizing. Your scalp and hair can get dry, especially when braided tightly. Use a lightweight oil, like coconut or jojoba, to keep your scalp hydrated. Apply it gently along your scalp and the length of your braids. Avoid heavy creams or lotions that can cause buildup. A little goes a long way. And don't forget about your edges! Those delicate hairs are prone to breakage, so apply a little edge control product to keep them neat and protected. Think of it like giving your braids a little drink and a protective shield. It's all about keeping them happy and healthy.
Care Tip | Why It's Important | How to Do It |
|---|---|---|
Silk/Satin Scarf or Bonnet | Reduces friction, prevents frizz. | Wear nightly before bed. |
Lightweight Oil | Hydrates scalp and hair. | Apply gently along scalp and braids. |
Edge Control | Protects delicate hairs. | Apply a small amount to edges. |
Styling Your Braids: Versatility and Protection
Now that you know how to care for your braids, let's talk about styling! One of the best things about 3 braids hairstyles is that they’re so versatile. You can wear them down, put them in a bun, or even create intricate updos. The possibilities are endless. If you want to keep your braids out of your face, try a high ponytail or a messy bun. You can also add accessories, like headbands or clips, to change up your look. I love using colorful scarves to add a pop of personality. It’s like having a whole new hairstyle every day without having to actually redo your braids.
Styling isn't just about looks, it’s also about protection. Try not to style your braids too tightly, as this can put too much stress on your scalp and cause breakage. Avoid using harsh chemicals or heat styling tools, as they can damage your hair and make your braids look dull. Instead, opt for natural styling products and techniques. If you want to add some volume to your braids, you can gently fluff them with your fingers. And remember, the key to any great style is confidence. Wear your braids with pride, and you'll look amazing. Seriously, it's all about owning your look and having fun with it.
Extending the Life of Your Braids: Maintenance and Touch-Ups
So, how long can you keep your 3 braids in? That depends on a few factors, like how fast your hair grows and how well you take care of them. Generally, you can keep braids in for 2-8 weeks, but it's important to listen to your hair. If you notice your scalp is getting itchy or your braids are starting to look frizzy and loose, it's probably time for a touch-up or removal. Don't wait too long, as this can lead to breakage and damage. I usually start to feel the urge to refresh my braids after about 4 weeks and that is my personal rule.
When it's time for a touch-up, you can either redo the whole style or just focus on the parts that need it most, like your edges or the braids around your face. You can also gently wash your braids to remove buildup and refresh your scalp. Use a clarifying shampoo and dilute it with water, and then gently massage your scalp. Make sure to rinse thoroughly and allow your braids to air dry completely. And remember, taking care of your braids is an ongoing process. It’s not just about the styling, it’s about the maintenance and care that keep them looking their best. So, treat your braids with love, and they’ll keep you looking fabulous for weeks to come.
Wrapping Up Your 3 Braids Journey
So, there you have it – a complete guide to mastering the art of 3 braids hairstyles. From the foundational three-strand braid to more complex techniques like French and Dutch braiding, you've now got the skills to create a variety of stunning looks. Remember, practice makes perfect, so don't be afraid to experiment and try new combinations. Whether you're aiming for a casual everyday style or an intricate updo for a special occasion, 3 braids offer endless possibilities. And with proper care and maintenance, your braids will stay looking fantastic. Now, go out there and show off your amazing 3 braids hairstyles!